Set up Clamp: the six Getting started steps
Updated Oct 9, 2026
What it's for. Getting started is the short list of setup steps that make the rest of Clamp work for your business:
- your overhead and markup, so estimates are priced to cover costs and profit;
- automatic mileage and time on site, so trips and hours record themselves;
- an AI estimate to try;
- a look at the customer portal your documents open in.
Each step takes a few minutes. It disappears from the list when it's done.
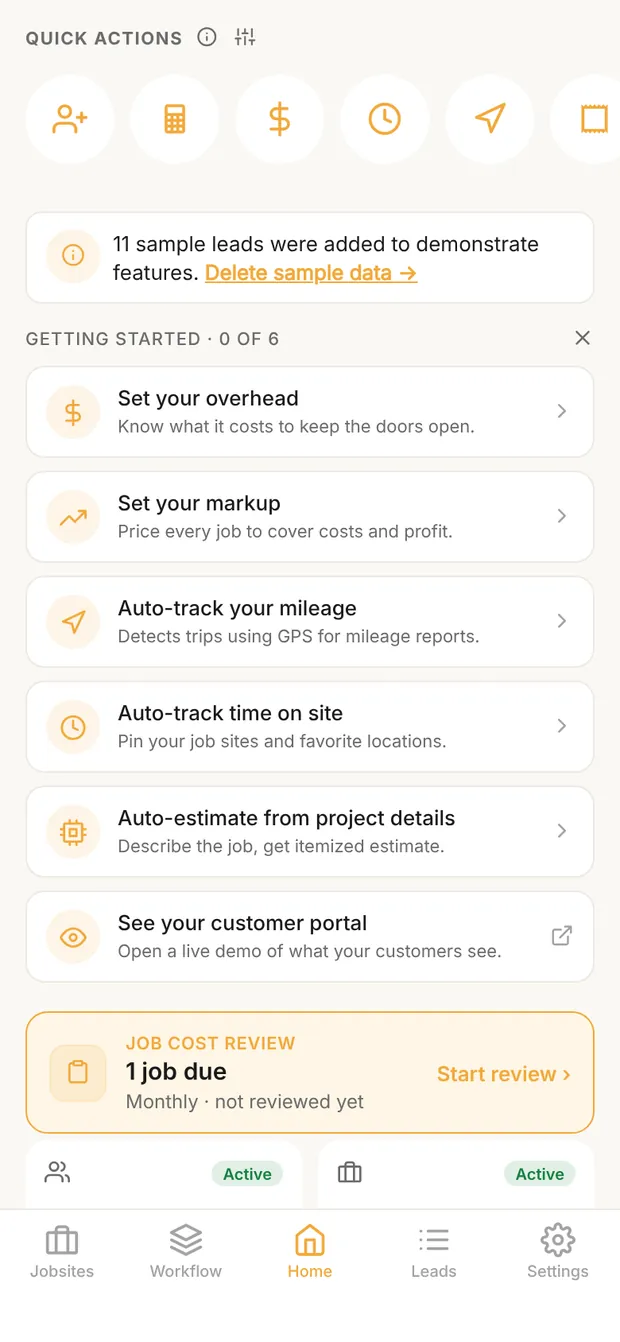
Where to find it
The same list shows in two places:
- on Home, under Quick actions;
- at the top of Settings.
Tap a card to go straight to its setting. The header counts your progress: "Getting started · 2 of 6" means two steps are done.
To clear the list:
- Swipe a card left and tap Don't show to hide that one card.
- Tap the × on Home for two options. Remind me in 7 days hides the list for a week. Don't show these again hides every card still open. In Settings, the × offers only Don't show these again.
A hidden card doesn't come back, but its setting is always in Settings.
The six steps
| Step | Opens | Done when | Read next |
|---|---|---|---|
| Set your overhead | Settings › Pricing, at Overhead | You save your overhead | Setting your overhead |
| Set your markup | Settings › Pricing, at Your markup | You save a markup | Setting your markup |
| Auto-track your mileage | Settings › Mileage Tracking | Auto-Detect Trips is on | Auto mileage tracking |
| Auto-track time on site | Settings › Time on Site | Site visit tracking is on | Auto time on site |
| Auto-estimate from project details | New Estimate: pick a lead | You've used your free AI estimates | How to write an estimate |
| See your customer portal | A live demo in your browser | You have a customer in your portal | The customer portal |
1. Set your overhead
Overhead is what it costs to keep the business open whether or not a job is running: insurance, the truck, your phone, software, the office. Clamp prices every estimate from it, so it comes first.
The card opens Pricing, which reads top to bottom: Overhead, then Profit goal, then Your markup. Tap Overhead and enter a monthly amount for each of the 21 categories that apply; Clamp shows the monthly and yearly totals. Leave out anything that's a cost of a specific job. Saving records a dated snapshot, so you can see later what changed.
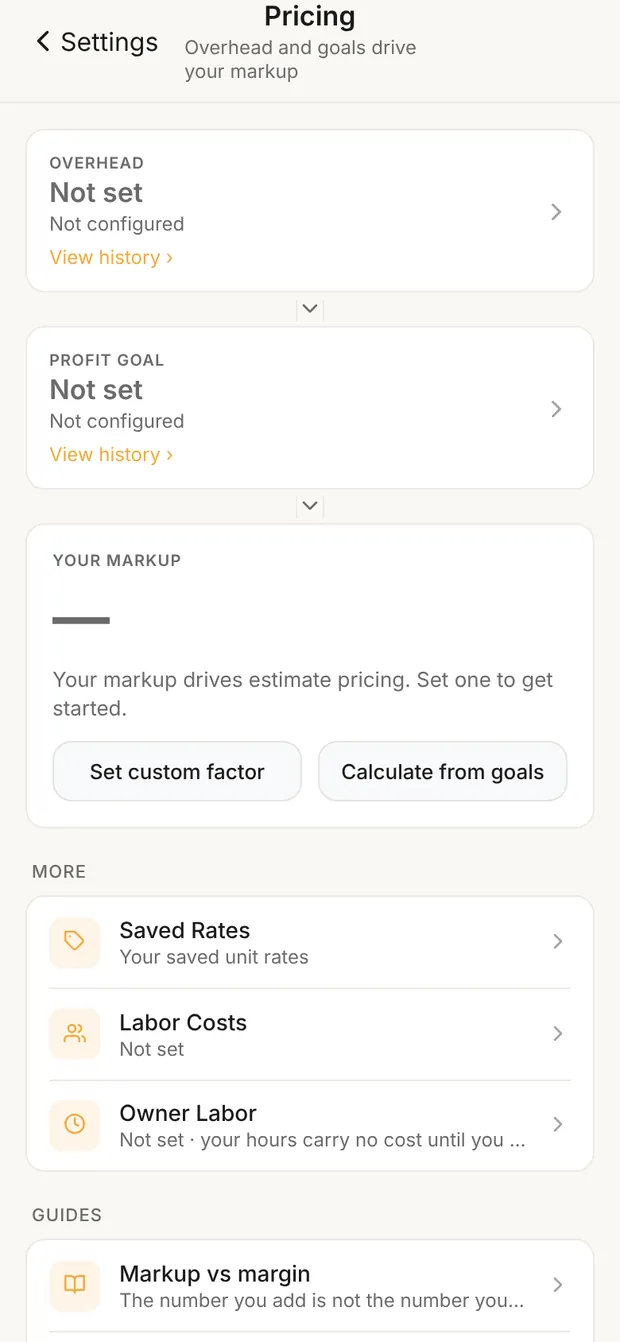
What goes in each category is in the 21 overhead categories.
2. Set your markup
Your markup turns job cost into price. On Pricing, under Your markup, choose one of two ways:
- Calculate from goals (recommended). Enter your annual revenue goal and your overhead, then the net profit you want on normal work, high-risk work and change orders. Clamp produces the three markups, and Save new markup version saves them.
- Set custom factor. Type the markup you already use, such as 1.50.
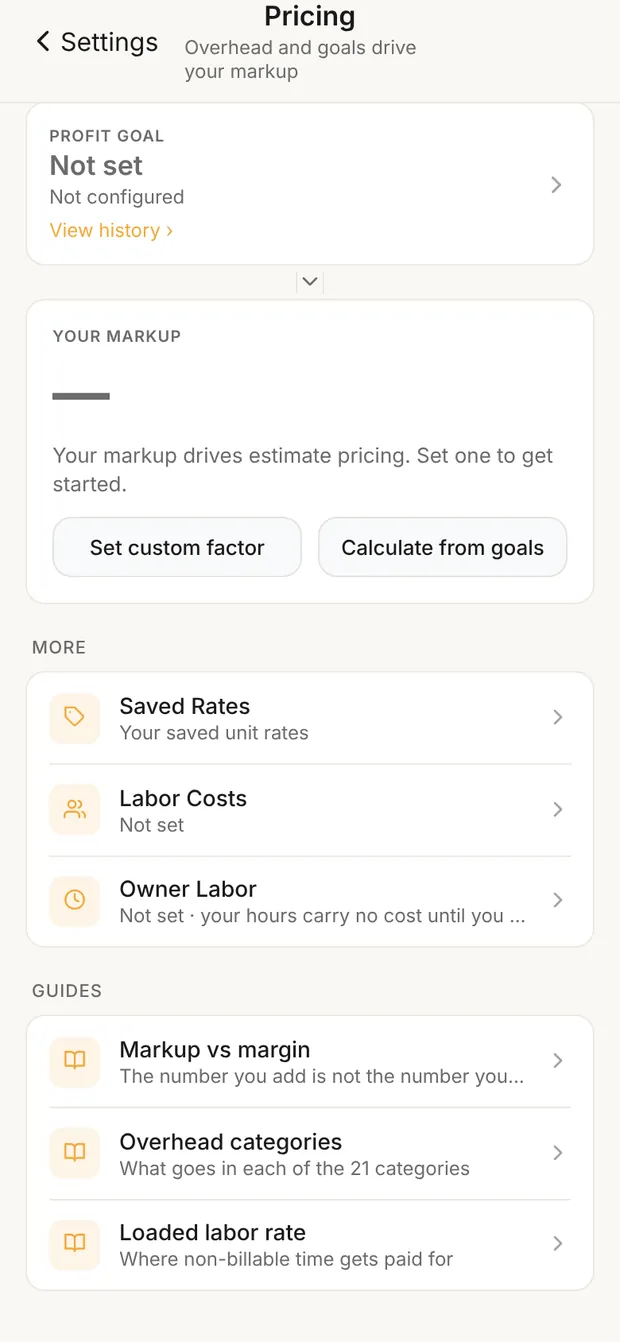
If you change your overhead later, Pricing shows Update to [new markup] so the markup keeps up. Why there are three markups is in three markups, one job cost. Markup isn't margin: see markup vs margin.
3. Auto-track your mileage
Clamp can notice when you drive and record each trip for your mileage log, without starting or stopping anything.
The card opens Auto-Track Mileage. At the top, the location card shows whether Clamp can track in the background. Tap Enable: Clamp asks for location right there. Choose Always Allow (iPhone) or Allow all the time (Android). Then turn on Auto-Detect Trips. Once it's on, you can also:
- turn tracking notifications on or off;
- set a custom tracking schedule, such as weekdays from 6 to 6.
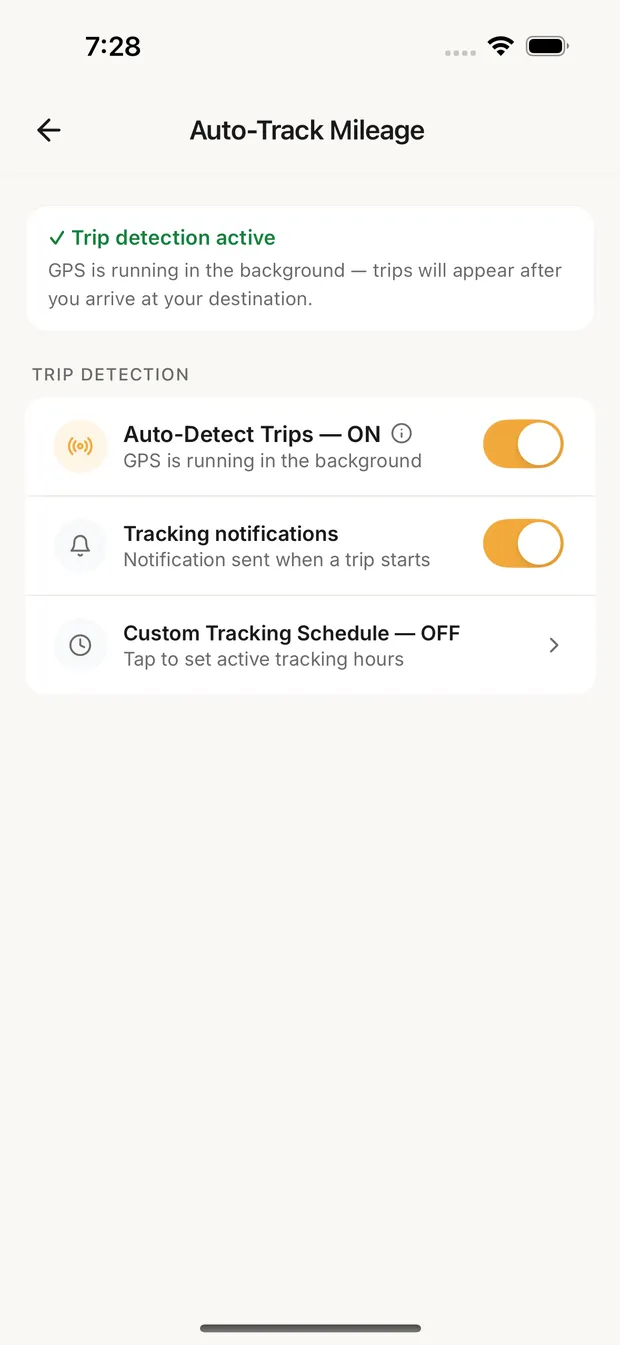
Trips wait for you to confirm them, then go into your mileage log. What each trip must show is in how to keep a mileage log.
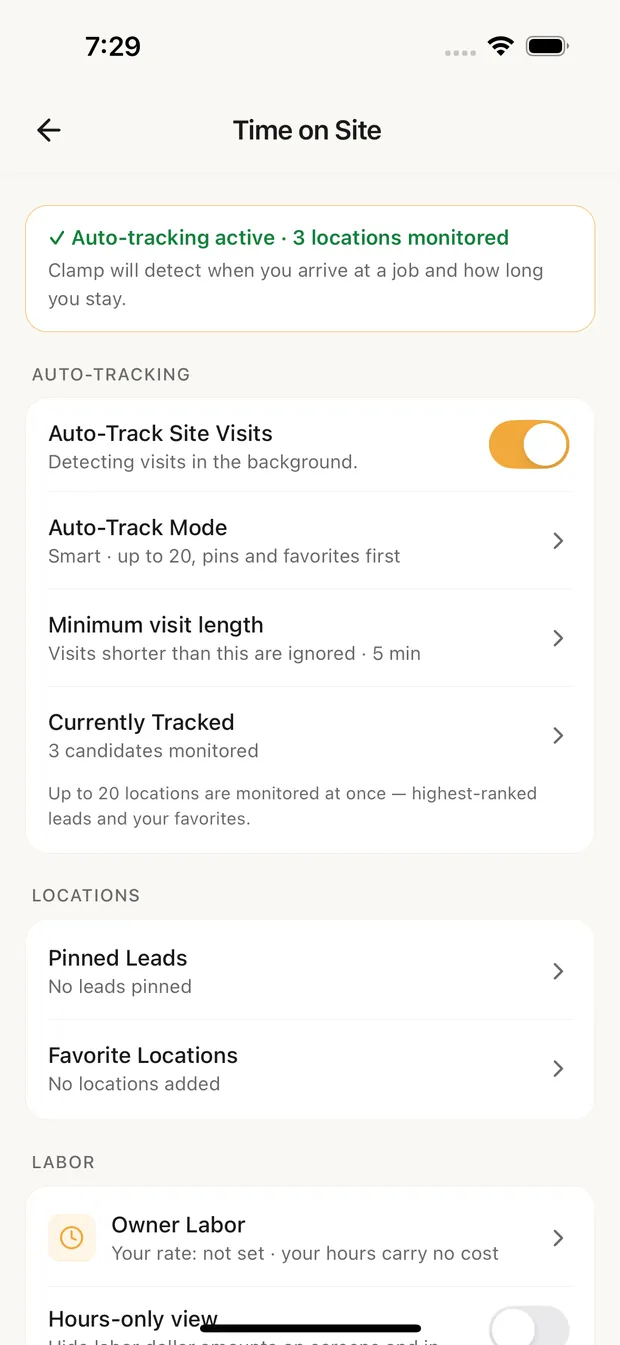
4. Auto-track time on site
Clamp can log how long you spend at a job site, with no clock in or out. A visit appears for you to confirm once you leave, and short stops are ignored.
The card opens Time on Site:
- Tap Enable and allow location Always.
- Turn on Auto-Track Site Visits.
- Choose Auto-Track Mode. Smart watches up to 20 places: your pinned leads and favorites first, then your most relevant jobs and leads. Favorites Only watches just your pinned leads and favorite places.
- Set Minimum visit length: 3, 5 or 10 minutes.
- Under Locations, pin the leads and favorite places you want watched.
Where the hours go and what each entry must show is in how to track time on a job.
5. Auto-estimate from project details
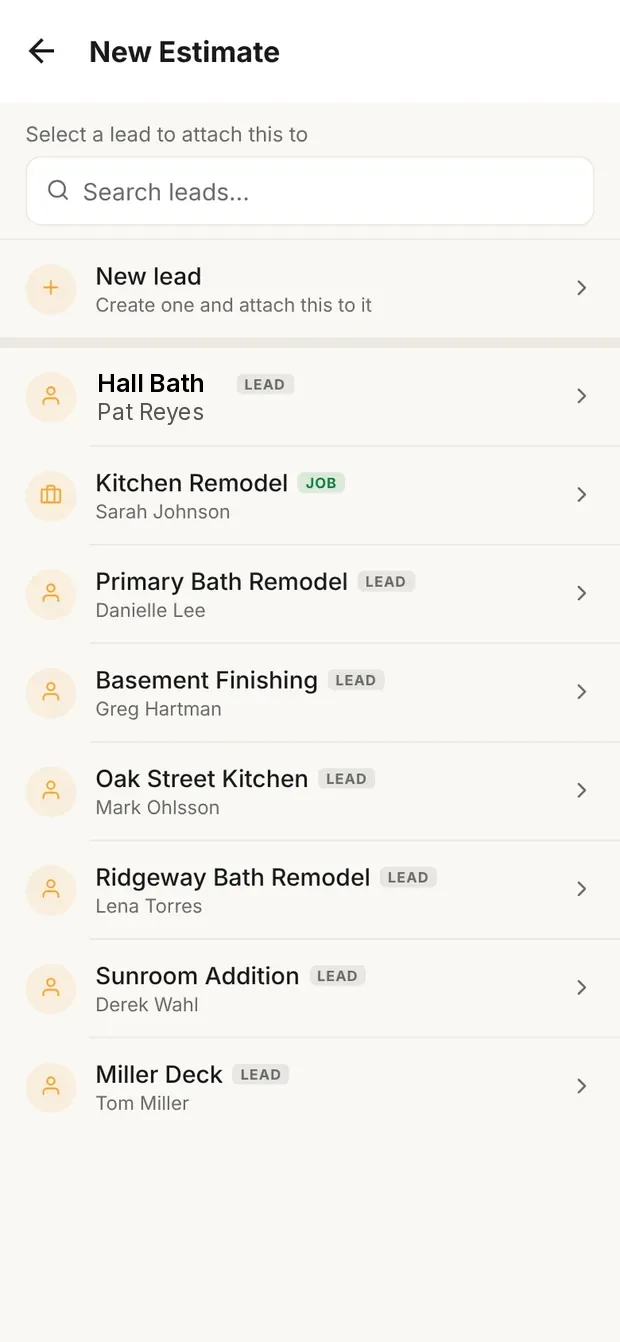
Describe the job in your own words and Clamp drafts an itemized estimate at cost, line by line, which you then check and adjust.
The card opens New Estimate. Pick the lead it's for, or New lead, then describe the project. On the free plan the card shows how many AI estimates you have left; there are three. The card goes away once they're used. Assistant and Teams don't see this card, because AI estimates come with the plan.
How to check the draft before it becomes a proposal is in how to write an estimate.
6. See your customer portal
The customer portal is where your customers open, sign and pay your documents and follow the job. The card opens a live demo in your browser (docs.clamppro.com/portal/demo), so you can see exactly what they see. It counts as done once you have a customer in your portal.
How it works from both sides is in the customer portal.
What these settings change
- Overhead and markup price every estimate, proposal and change order you build.
- Mileage tracking fills your mileage log and the mileage on each job.
- Time on site fills hours on each job, which count as labor cost at your loaded rate.
- AI estimates start the estimate. You still check every line.
- The portal is where documents you send open for your customer.
Read next
- The Settings menu, section by section
- The Clamp method, first call to closeout